
For some time, you may try to format external hard drive or USB and all the time, getting error messages like 'Windows was unable to complete the format' or 'Windows Couldn't Format the Drive'. This may occur because of subsequent reasons and there is no guarantee that you'll able to format it by using some tactics.
Such sort of problems is pretty common with modern hard drives or USB's and might ends up with losing all of your valuable stuff permanently. Though, you might able to recover data if you're lucky enough and the storage device isn't completely dead.
Here's how the problem goes:
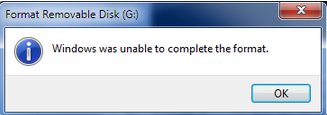
As soon as you connect the external hard drive to your PC, a pop up message will open and asks you to format the drive so you can use it further. Pressing Yes button will brings the error message as described earlier i.e. Windows was unable to complete the format. Formatting the hard drive using disk management utility will not help you either. Remember, unsuccessful formatting from the disk management will left the hard drive with RAW file structure. After that, CHKDSK utility will not helps in fixing the damaged hard drive file structure.
In such cases, using various hard disk diagnostics tool or third party hard drive formatting tool is completely waste of money as well as takes your countless unsuccessful attempts to format hard drive.
Note: You might not able to recover data from such drives until you format it completely. So you're at huge risks of losing your valuable data forever specially when you haven't any copy of recently created backups.
Format drive using Diskpart
As the GUI based hard drive formatting method is not helpful anymore, we may switch to command based formatting method and see if we can get it done here. Follow the steps mentioned below and hopefully everything goes well.
Now, you may able to use your drive (either external hard drive or USB) as before without any problem. Remember, data on the drive was completely erased but you can refer to various available recovery programs and see if you may able to get your data back.
Such sort of problems is pretty common with modern hard drives or USB's and might ends up with losing all of your valuable stuff permanently. Though, you might able to recover data if you're lucky enough and the storage device isn't completely dead.
Here's how the problem goes:
As soon as you connect the external hard drive to your PC, a pop up message will open and asks you to format the drive so you can use it further. Pressing Yes button will brings the error message as described earlier i.e. Windows was unable to complete the format. Formatting the hard drive using disk management utility will not help you either. Remember, unsuccessful formatting from the disk management will left the hard drive with RAW file structure. After that, CHKDSK utility will not helps in fixing the damaged hard drive file structure.
In such cases, using various hard disk diagnostics tool or third party hard drive formatting tool is completely waste of money as well as takes your countless unsuccessful attempts to format hard drive.
Note: You might not able to recover data from such drives until you format it completely. So you're at huge risks of losing your valuable data forever specially when you haven't any copy of recently created backups.
Format drive using Diskpart
As the GUI based hard drive formatting method is not helpful anymore, we may switch to command based formatting method and see if we can get it done here. Follow the steps mentioned below and hopefully everything goes well.
- Start typing CMD from the Windows 7 start menu search bar.
- Right click on the Command Prompt from the main menu and choose Run as administrator
- Enter the administrator passwords and hit OK
- Type diskpart on the black screen and hit enter. This will lists all the currently attached storage device i.e., internal or external or both.

- All the drive will be listed with numbers assigned to it. Find your problem drive by focusing attention on the drive size and its status.
- Type select disk N, where N is the numbers assigned to your problem drive.
- Type clean and hit enter. Disk Part will begin cleaning your drive and removes any damaged files structure it founds while scanning the drive.
- Once the confirmation message appears that disk part successfully cleaned the disk, we need to create a primary partition the targeted drive by typing and hitting enter create primary partition.
- On the next step, type format fs=fat 32 quick and press enter. Now the drive will be formatted in FAT format. Quick stands for performing quick format instead of clean format which may takes time longer than usual.
- Now we need to assign the drive later to the problem drive. You can do so by assign command. Simply type assign on the same screen and hit enter and disk part will assign any available drive name for your drive.
- Type exit and hit enter.
Now, you may able to use your drive (either external hard drive or USB) as before without any problem. Remember, data on the drive was completely erased but you can refer to various available recovery programs and see if you may able to get your data back.